Contact Us

Products

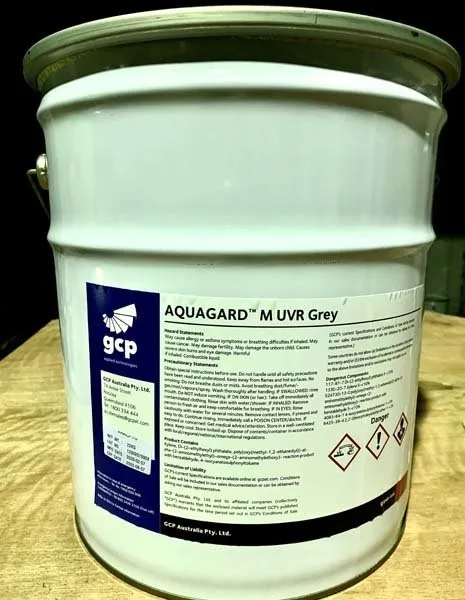
AQUAGARD™ M UVR

One-part polyurethane waterproofing membrane for horizontal applications

Get a Quote Download PDF

Description

A one-part, liquid applied, high solids, polyurethane (PU) waterproofing membrane. It is formulated for simple, high build application to horizontal substrates. After application, the product cures through reaction with ambient humidity, forming a flexible, elastomeric membrane.
Uses

AQUAGARDTM M UVR and Non-Slip Top Coat system is specifically designed for use as a non-slip, fully-exposed membrane on foot- trafficable areas, including:

  • Plant room floors
  • Balconies
  • Roof-decks
  • Sill or window flashings
  • Podiums
  • Bunds
  • Exposed pathway areas

Advantages

  • Seamless – liquid applied and monolithic, eliminating vulnerable joins, seams and laps
  • Self-levelling – quick application
  • Fully Bonded – no water tracking between membrane and substrate
  • Simple Application – one-part, humidity cured. Applied by squeegee, roller or brush to horizontal surfaces
  • Cold Applied – no flame or heat required for application
  • Low VOC – reduced EH&S issues on site
  • Flexible – long life elastomeric membrane. Accommodates normal structural movement and bridges non-structural concrete shrinkage cracks without requiring full membrane reinforcing
  • Polyurethane Chemistry – free from bitumen or tar – will not bleed or stain
  • External Above Ground – designed to meet the requirements of AS 4654-2012

System Components

  • AQUAGARD™ M UVR – 1-part PU membrane
  • AQUAGARD™ M Clear Primer – 1-part solvent based PU primer for dry cementitious, masonry, metal and timber substrates
  • EPOCOTE™ F100W Clear – 2-part, water borne epoxy primer for green, damp or dry cementitious, masonry and metal substrates
  • EPOCOTE™ F100W Grey – 2-part, water borne, filled epoxy primer for green, damp or dry cementitious, masonry and metal substrates, or poor quality/damaged concrete
  • AQUAGARD™ M Non-Slip Top Coat – 2-part, solvent based, UV stable PU, protective top coat. Only used over exposed AQUAGARD™ M UVR membrane or in foot trafficable areas
  • SILCOR® LM PU Sealant – 1-part polyurethane sealant for detailing and joint sealing
  • Reinforcing PE Fabric Strip – Non-woven, needle punched polyester reinforcing fabric. For membrane reinforcement at high movement junctions

Design

Generally, all horizontal substrates to have a minimum 1:100 fall to drainage and/or not retain water other than residual due to substrate surface tension.

Compatibility / Adhesion

AQUAGARD™ M UVR may be applied to the following cured, stable, prepared and primed substrates:

  • Concrete, blockwork, brick
  • Cementitious screed, render or topping slabs
  • Water resistant timber, plywood or particle board
  • Metals
  • Compressed fibre cement sheet (CFC)
  • Cement composite sheet (CCS)
  • Glass reinforced concrete (GRC)
  • Rendered, aerated autoclaved concrete (AAC)

Substrate Quality

Substrates must be structurally sound, smooth, clean and dry.

New Concrete

Well compacted, moist-cured as required by AS 3600. Minimum age of concrete at time of waterproofing application should be 14-28 days, dependent on concrete thickness and GCP primer being used.

Curing and Form Release Compounds

Only non-permanent, degrading acrylic types may be used. Residues must be removed by water blasting or grinding prior to priming.

Wax emulsion, oil, hydrocarbon, hydrocarbon resin, chlorinated rubber, silicon containing or bitumen emulsion types are unacceptable.

Concrete Strength

Compressive strength – minimum strength grade 25 MPa. Surface pull-off strength – minimum 1.0 MPa for non-trafficable and 1.5 MPa for trafficable surfaces.

Concrete Finish

Steel trowel, light power float or off-form, to give a well compacted (not burnished) surface free of honeycombing, voids or excessive porosity. Porous, low surface strength, tamped, bull float or broom finishes are unacceptable.

Where non-ponding external surfaces are specified, in accordance with AS 4654.2, concrete provided to the applicator shall be set to falls and free of ponding depressions.

Concrete Block, Brick and Stone Masonry Finish

Sound, flush pointed mortar joints with no gaps or voids.

Screeds and Toppings

Sound, fit for purpose and resistant to fracture or break-up in use.

Substrate Preparation

Concrete and Masonry

Remove all dirt, dust, concrete spillage, weak material, laitance, oil, grease, coatings, curing compounds, form release agents, tyre rubber marks, rain damage and other contaminants/defects by an appropriate method. This may include brooming, vacuuming, scraping, water blasting (4000 psi with RotorJet head), captive sand blasting or grinding.

Chamfer external corners and remove residues from internal corners and expansion joints.

Repair non-structural defects including bug holes, honeycombing, rain damage and gross pin holing using a minimum 25 MPa, low shrinkage PMC or epoxy repair mortar or fairing compound.

Advise main contractor of identified structural cracks and moving construction joints. Rectifications to be arranged by main contractor.

Chase shrinkage cracks and construction joints to a minimum size of 6 x 6mm and clean chase.

Allow all repairs to cure fully and dry to a moisture content below the maximum allowable for the GCP primer being used (see relevant primer PDS).

Note – Outgassing occurs naturally in concrete surfaces and can lead to pin hole formation in applied primers, membranes and coatings. Rectification of rain damaged or burnished concrete by grinding or sand blasting can expose high porosity concrete, leading to increased outgassing. The applicator must assess the prepared substrate for porosity and adjust repair and priming methods accordingly to minimise the effects of outgassing.

Compressed Fibre Cement Sheet

Ensure sheeting materials used are free of all surface sealers, coatings and acrylic primers.

Ensure sheets have been installed to the manufacturer’s requirements, and are clean, dry and contaminant free.

Light Weight Cement Composite Sheet

In addition to CFC sheet requirements, due to laminar structure and low internal strength of CCS sheets, they must be prepared and primed carefully using a very low viscosity, high penetration primer such as AQUAGARD™ M Clear Primer.

Metals

Remove all dirt, dust, oil, grease, corrosion and oxides from steel, aluminium, zinc/galvanising, copper, stainless steel etc. and roughen surface by abrasion or garnet blasting to SA 2.5 near white metal. Solvent wipe with clean MULTITEKTM Xylene or methyl ethyl ketone (MEK) on a clean, lint free cloth. Prime surface within 30 minutes to minimise surface oxidation.

Difficult to prime metals such as stainless steel may be primed using a silane coupling agent such as DC1200 OS from Dow Corning.

Follow the manufacturer’s directions completely and apply membrane within the DC 1200 OS recoat window.

Plastics

Remove all dirt, dust, oil, grease and other contaminants.

For PVC, epoxy, polyester and ABS, solvent wipe with MEK solvent immediately prior to priming.

For difficult to bond plastics such as HDPE or PP, consult the GCP Technical Department before proceeding.

Aerated Autoclaved Concrete (AAC)

Surface must be rendered to seal and provide a strong, smooth finish. Allow render to dry to a moisture content below the maximum allowable for the GCP primer being used (see relevant primer PDS).

Application Conditions

The following GCP product application details assume typical conditions of 22°C and 60% relative humidity. Allowance must be made by the applicator for product application and cure times that vary from these typical conditions.

Detailing

External Above and Below Ground Areas

Detail according to NCC and AS 4654.2 requirements, by installing minimum 15 x 15mm bond breaker fillets of SILCOR® LM PU Sealant to all internal corners, penetrations, drainage outlets etc.

Allow sealant to cure a minimum 24 hours.

Expansion Joints

Install suitable backer rod to joints. Set depth to achieve correct joint geometry (see SILCOR® LM PU Sealant PDS).

Gun SILCOR® LM PU Sealant to joint recess and tool to a smooth concave finish. Allow sealant to cure a minimum 24 hours.

Chased Non-Moving Construction Joints & Shrinkage Cracks

Prime chased sides using AQUAGARD™ M Clear Primer. Allow to cure tack free.  Gun SILCOR® LM PU Sealant to primed chase within 24 hours of priming.  Tool to a smooth concave finish.  Allow sealant to cure a minimum 24 hours.

CFC & Cement Composite Sheets Joints

Gun SILCOR™ LM PU Sealant to joint and tool to a smooth concave finish. Allow sealant to cure a minimum 24 hours.

Priming

General

Ensure the following parameters are met prior to and during primer application:

PARAMETER LIMITS
Substrate Temperature +5°C to +35°C with temperature stable or falling
Ambient Temperature +5°C to +35°C
Relative Humidity 30% to 85%
Dew Point Minimum 3°C below substrate temperature

Concrete, Masonry, Screeds and CFC Sheet

Application to highly porous substrates while substrate temperature is increasing may result in concrete outgassing and pinhole formation in primer. This can be reduced or prevented by priming substrates in the late afternoon or evening, when concrete temperature is stable or falling.

Adjust applicator procedures and schedule to suit local conditions.

Concrete, Masonry, Screeds and CFC Sheet

– Below 5.0% Moisture Content

Prime prepared substrates using AQUAGARD™ M Clear Primer, EPOCOTE™ F100W Clear or EPOCOTE™ F100W Grey at a minimum rate of 0.3kg/m², by roller. Consult the relevant primer PDS for further information.

Coverage rate is dependent on surface porosity and may require two or more applications.

Light Weight Cement Composite Sheet

Prime low porosity surfaces or compressed fibre cement / composite cement sheet, using AQUAGARD™ M Clear Primer for highest penetration and adhesion. Apply primer to give full coverage without ponding or pin holing, producing a low gloss surface finish. Inspect the primed surface for pin holes and reprime to seal if necessary. Repriming to seal concrete pin holes is more time and cost effective than later rectifying pin holes in the membrane.

Allow primer to cure tack free. Within 24 hours of priming (@22°C) apply membrane to primed surfaces. Refer to relevant primer PDS for recoat times at other temperatures, and treatment if recoat time of primer is exceeded.

If recoat time of primer is likely to be exceeded, broadcast the freshly applied primer with clean, kiln dried, sharp quartz sand of 0.5 to 1.0mm diameter to 120% coverage (to refusal). Allow primer to cure completely and remove excess loose sand by vacuuming. Membrane may be applied to the sand blinded surface up to 14 days after laying, provided the surface remains clean, dry and free of all contamination.

Concrete, Masonry, Screeds and CFC Sheet

– Below 10% Moisture Content

Prime prepared substrates using EPOCOTE™ F100W Clear at a minimum rate of 0.3kg/m², by roller. Consult the relevant primer PDS for further information.

Coverage rate is dependent on surface porosity and may require two or more applications.

For low porosity cementitious surfaces, dilute mixed primer up to 20% with clean water to aid penetration and flooding of pin holes.

Allow to cure tack free. Within 24 hours reprime with undiluted EPOCOTE™ F100W Clear.

Apply primer to give full coverage without ponding or pin holing, producing a low gloss surface finish.

Allow primer to cure tack free. Within 24 hours of priming (@22°C) apply membrane to primed surfaces. Refer to relevant primer PDS for recoat times at other temperatures, and treatment if recoat time of primer is exceeded.

If recoat time of primer is likely to be exceeded, broadcast the freshly applied undiluted primer with clean, kiln dried, sharp quartz sand of 0.5 to 1.0mm diameter to 120% coverage (to refusal). Allow primer to cure completely, then remove excess loose sand by vacuuming. Membrane may be applied to the sand blinded surface up to 14 days after laying, provided the surface remains clean, dry and free of all contamination.

Light Weight Cement Composite Sheet

Prime using only AQUAGARD™ M Clear Primer, at a minimum 0.3kg/ m². Two or more primer applications will be required, to penetrate and consolidate the sheet substrate.

Inadequate priming can result in delamination within the sheet structure and apparent membrane delamination, particularly in exterior installations.

Allow primer to cure tack free. Within 24 hours of priming (@22°C) apply membrane to primed surfaces.

Membrane Application

General

Ensure the following parameters are met before and during application:

PARAMETER LIMITS
Substrate Temperature +5°C to +35°C with temperature stable or falling
Ambient Temperature +5°C to +35°C
Relative Humidity 30% to 85%
Dew Point Minimum 3°C below substrate temperature
Condition Clean, dry and free from condensation, contaminants, stones, leaves etc.

Application Equipment

AQUAGARD™ M UVR membrane is best applied in one application by 5mm notched squeegee. It can also be applied by medium-nap, non- shedding brush, roller or airless spray in two coats.

Mixing

Mix material thoroughly before use using a minimum 650W slow speed drill (maximum 300 RPM) fitted with a clean paddle or “Jiffy” type mixer, avoiding air entrapment.

Applied Membrane Thickness Control

Apply membrane at or above the minimum required thickness, as detailed in this PDS, or in the project specification.

Test applied thickness using a clean, accurate Wet Film Thickness (WFT) gauge and adjust applied thickness accordingly.

Horizontal, Vertical or Sloping Application

AQUAGARD™ M UVR is suitable for horizontal applications. Minimum required Dry Film Thickness (DFT) is typically achieved in one or two applications. Note this product is self-levelling. Multiple coats are required for vertical applications.

Movement Areas

At potential high movement areas such as expansion joints, open construction joints and active cracks, install a slip tape centred over the joint or crack. Slip tape should be a minimum 90mm wide for expansion joints, minimum 45mm wide for open construction joints and minimum 20mm wide for moving cracks. Slip tape must be polyethylene faced, single sided adhesive and resistant to primer, membrane, xylene and heat. Suitable tapes are 3M 8979 or Tesa 58663.

Reinforcing

Full reinforcing of AQUAGARD™ M UVR is not typically recommended, provided the membrane is applied to the minimum specified WFT/DFT. Where high movement is expected at junctions and joints, and use of a slip tape is not possible, a reinforcing strip may be employed, as detailed in Membrane Detailing below.

Membrane Detailing

To the SILCOR® LM PU Sealant detailed internal corners, chamfered external corners, construction joints, penetrations, drainage outlets and cracks, apply AQUAGARD™ M UVR as a minimum 150mm wide application centred over the sealant fillet/corner/slip tape. Apply to provide a minimum 1.0mm DFT and allow to cure to minimum recoat time.

To the SILCOR® LM PU Sealant detailed expansion joints, apply AQUAGARD™ M UVR as a minimum 200mm wide application centred over the joint slip tape.  Apply to provide a minimum 1.0mm
DFT and allow to cure to minimum recoat time. Where reinforced membrane is required in high movement areas, without slip tape, the following process is recommended to ensure correct membrane
function:

i) Apply AQUAGARD™ M UVR to a minimum 1.0mm DFT as detailed above and allow to cure to minimum recoat time.
ii) Apply a second coat of membrane and lay Reinforcing PE Fabric strip into the wet membrane. Wet fabric through with membrane completely, ensuring no bubbles or wrinkles are present.
iii) While wet, apply additional membrane to fully cover the reinforcing fabric with a minimum 1.0mm of membrane. Allow to cure to minimum recoat time.

Application of Continuous Membrane

Apply AQUAGARD™ M UVR membrane to primed and previously membrane detailed areas, at or above the minimum required thickness in one or two coats.

Required minimum thickness is dependent on installation area, type of use of the area, topping or membrane protection being employed and product warranty period required, and will be specified in the GCP project specification or architect’s specification. Where not specified, a minimum DFT of 1.5mm must be employed, in one or two coats.

Allow to dry fully between coats. Test WFT during application using a WFT gauge and adjust applied thickness accordingly.

Continue membrane to turn-ups by a minimum 100mm above finished surface level, or as detailed in project specification.

Typical Membrane Cure & Recoat Times

Ambient Temp. (°C) Tack Free Time (Hrs) Minimum Recoat Time (Hrs)1 Maximum Recoat Time (Hrs)2 Ready for Backfilling, Topping or Flood Test (Hrs)3
35 3 8 36 36
30 3.5 10 40 40
22 4 12 48 48
10 10 18 72 72
5 15 30 132 130

Note – Above times will be extended if RH (Relative Humidity) is less than 60%
1 – Minimum Recoat Time = Light Applicator Foot Traffic Allowed
2 – Maximum Recoat Time = Applicator Foot Traffic Allowed
3 – Ready for Flood Test etc. = Open to Access by Other Trades

Top Coat

Mix AQUAGARD™ M Non-Slip Top Coat and apply minimum two coats by brush, roller or airless spray to a total rate of 0.3 kg/ m2 to give uniform finish with dft 0.15mm. For best finish, apply successive coats at a cross-direction to previous coat

Clean-up

Clean application equipment immediately using xylene solvent. Cured product must be removed mechanically.

Protection and Surfacing

AQUAGARD™ M UVR must be permanently protected from damage by application of one of the following:

Direct Stick Tiles, Bonded Screed or Topping Slab

Membrane surface should be compatiblised before application of cementitious tile adhesives, bonded screed or topping slab by one of the following methods:

  1. Between 12 and 48 hours of final membrane application, solvent wipe the membrane surface using isopropanol. Allow to dry, then apply a coat of AQUAGARD™ M UVR membrane at a rate of 0.4 kg/ m² (0.3 L/m²). Broadcast the freshly applied membrane with clean, kiln dried, sharp quartz sand of 0.6 to 1.2mm diameter to 120% coverage (to refusal). Allow membrane to cure at least 24 hours and remove excess loose sand by vacuuming. Membrane must not be visible through the sand cover.
  2. Between 12 and 48 hours after final membrane application, solvent wipe the membrane surface using isopropanol. Allow to dry, then apply EPOCOTE™ F100W Clear at a rate of 0.3 kg/m². Broadcast the freshly applied EPOCOTE™ with clean, kiln dried, sharp quartz sand of 0.6 to 1.2mm diameter to 120% coverage. Allow EPOCOTE™ to cure at least 12 hours and remove excess loose sand by vacuuming.

Tiles may be applied using high quality polymer modified cementitious tile adhesives. Screeds and toppings should be polymer modified, or have a minimum 25 MPa compressive strength, to resist break-up in use.

Unbonded Screed or Topping Slab

Install PROTECTOBOARD™ or a double layer of minimum 250 micron builder’s plastic over the cured membrane as a slip sheet, prior to installation of screed or topping slab. Ensure all protection sheet laps are taped to seal.

Backfill

Install PROTECTOBOARD™ or RAPID-DRAIN™ to membrane as protection and/or drainage prior to backfilling with graded fill or filling of planters with soil.

Where non-graded fill is to be used, install PROTECTOBOARD™ HS or high compressive strength drainage cell as protection.

Landscaping

Install PROTECTOBOARD™, RAPID-DRAIN™, heavy duty drainage cell or heavy duty needle punched geotextile (minimum 500gsm) over the cured membrane as protection and/or drainage prior to soil loading.

Pavers

Install pavers on adjustable jack stands positioned directly on the membrane surface. Where gaps between pavers will be present, protect the membrane from direct and indirect UV exposure by applying AQUAGARD™ M Non-Slip Top Coat or heavy duty (minimum 500gsm) geotextile prior to jack and paver installation.

Insulation and Ballast

Install foam sheet insulation over RAPID-DRAIN™ to ensure free drainage to falls. Cover insulation with geofabric prior to loading of pebble ballast.

Top Coat to Exposed Non-Traffic Areas

Protect all exposed membrane (turn-ups, planter boxes above soil level etc) by application of AQUAGARD™ M Non-Slip Top Coat within 72 hours of membrane application. Apply at a minimum rate of 0.3 kg/m² in two coats to give a minimum DFT of 150 micron.

Maintenance

Refer to the relevant GCP Maintenance Manual for details.

Supply and Packaging

Product Package Size
AQUAGARD™ M UVR 22 kg pail
AQUAGARD™ M Clear Primer 17 kg drum (17.9 L)
EPOCOTE™ F100W Clear – Resin 10 L pail
EPOCOTE™ F100W Clear – Hardener 10 L pail
EPOCOTE™ F100W Grey – Resin 10 L pail
EPOCOTE™ F100W Grey – Hardener 10 L pail
SILCOR® LM PU Sealant 600 ml sausage
Reinforcing PE Fabric 100/150/300mm x 50m roll
AQUAGARD™ M Non-Slip Top Coat
– Resin
15 kg drum (13.2 L)
AQUAGARD™ M Non-Slip Top Coat –
Hardener
3 kg can (3.0 L)
PROTECTOBOARD™ 1830 x 1220 x 3mm
PROTECTOBOARD™ HS 1830 x 1220 x 4mm
RAPID-DRAIN™ 15240 x 1220 x 10mm

Estimating

Application rates below are typical values for various applications. Required application rates for specific projects may be higher (or lower) than shown, dependent on structural design, area of application, project specification and product warranty period required.

Please contact your local GCP representative or the GCP Technical Department for information specific to your project estimating requirements.

Application Area Minimum Application Rate
External Above Ground 1.5mm DFT
1.75mm WFT; 2.41kg/m²; 1.75 L/m²
External Below Ground 1.5mm DFT
1.75mm WFT; 2.41kg/m²; 1.75 L/m²
Internal Wet Area Floors 1.5mm DFT
1.75mm WFT; 2.41kg/m²; 1.75 L/m²
Internal Wet Area Walls Generally not used
Water Tanks (Internal Lining) 1.5mm DFT
1.75mm WFT; 2.41kg/m²; 1.75 L/m²

Storage

Product should be stored in original packaging at temperatures between 15° and 25°C, under cover and protected from all sources of heat, ignition, moisture, frost and direct sunlight.

Shelf Life

Six (6) months from date of manufacture when stored in original, unopened packaging, in accordance with storage conditions detailed above. Once opened, product may solidify within days.

Property Typical Value
Liquid Membrane Properties
Membrane Chemistry High solids polyurethane
Appearance Grey viscous liquid
Specific Gravity1 (g/ml) 1.40 ±0.03
Viscosity1 (mPa.s)
Brookfield (LV spindle 3/12 rpm)
6,000 ±1,000
Solids Content (%w/w) 91 ±3
Tack Free Time1 (hours) 4
Gel Time1 (hours) 6
Min. Recoat Time1 (hours) 12
Max. Recoat Time1 (hours) 48
Min. Cure Time1 – Ready for flood
testing, topping, backfilling (hours)
48
Fully Cured Membrane Properties
Shore A Hardness (°A) 70 ±5
Tensile Strength (MPa) > 2.5
Elongation (%) > 500
Tear Strength (N/mm) > 53.0
Adhesion to Primed Concrete (MPa) > 1.5
Cyclic Crack Bridging Pass – Class III
Root Resistance Resistant to nonaggressive root systems
Bio Resistance Resistant to microbial degradation

1 – Tested at 25°C / 60% RH. Values may vary dependant on temperature and/or humidity at time of use

The above values and properties do not constitute a specification.

Health and Safety

For all GCP products, read the product label and Safety Data Sheet (SDS) before use.

Always wear PPE detailed in the SDS for this product and comply with all risk and safety phrases detailed. SDS is readily available from GCP Applied Technologies.

AQUAGARD™ M UVR is slippery when uncured. Avoid walking on applied or spilt product.

Limitations

When combined with AQUAGARDTM M Non-Slip Top Coat and applied at recommended thickness, the system is suitable for foot traffic. However, this system is not suitable for vehicle traffic. Minimum applied thickness required is dependent on intended areas of application and warranty period desired. Consult your GCP sales representative or the GCP Technical Department for further information.

Cure rate is affected by temperature and humidity.

High temperatures and/or high humidity will cause rapid surface skinning and cure.

Low temperatures and/or low humidity will significantly extend cure time. Humidity below 25% RH can prevent product cure. Information contained in this document does not cover all possible application scenarios or imply product suitability for an application.

Please contact your local GCP representative or the GCP Technical Department for further information.

Warranties

GCP and contractors recognised by GCP as experienced in the application of GCP products will provide warranties for individual projects. Warranty periods offered are dependent on project details and complexity. Requests for very long warranty periods may necessitate increased membrane thicknesses to ensure longevity.

Contact your local GCP representative for further details.

Release Date: 02/11/18. The information contained in this product data sheet supersedes all previous versions.

Scroll to top